Table of contents
Synchronised Storage
A storage, or Network Attached Storage (NAS), is a device accessible by the synchronisation hub through the network using the SSH protocol. It can be located behind an Internet service provider or in a data center.
The storage page is divided into 4 tabs:
Overview
The overview tab contains general information about the storage unit and the channels explorer. The storage capacity, and a progress bar are visible at the top of the window. The cannels explorer is available at the bottom.
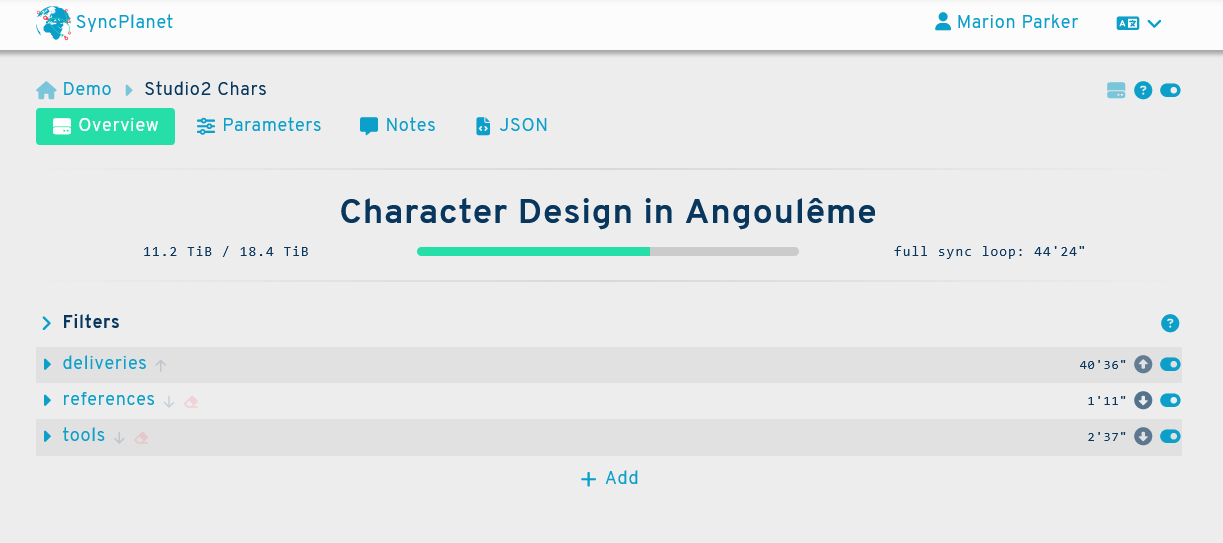
Channels explorer
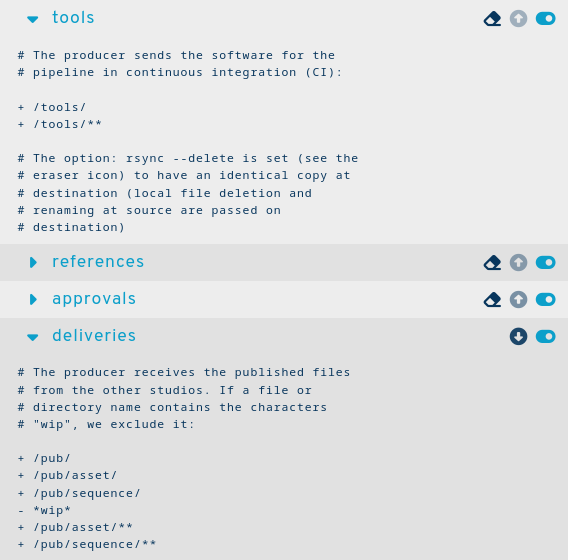
This interface lets you explore the configured synchronisation channels between the storage and its hub. Multiple channels can be expanded using the and buttons, allowing you to consult the details of several channels.
A channel's status is shown using a (activated) or a (deactivated) icons. You can toggle a channel on and off by clicking this button.
The direction of the transfer is shown using up (upload) and down (download) arrow icons. The current transfer activity is shown using a blinking arrow.
Some important rsync options are shown on the link line like the eraser icon which means that the --delete rsync option is used for that link.
Tip
Hover over the up or down arrows to see the ETA and if the upload/download was succesful, the duration of the process
upload finished on 23-12-15 11:19:03+00:00
duration 9"
Note
Click directly on a channel's name to access its settings.
Read the rsync filters and the rsync options sections for more details about the links and how to configure them.
Parameters
The tab is divided into three sections:
- The parameters at the top
- The health status at the bottom left
- The geographic map at the bottom right
Storage parameters
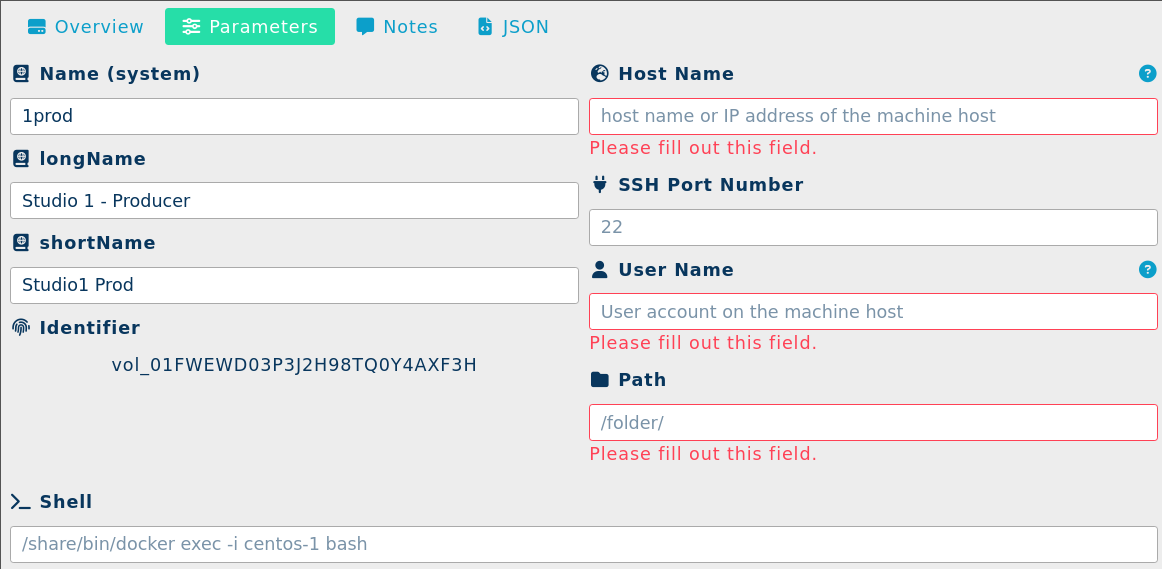
Here is a list of parameters and their descriptions:
Long name
A longer name, often the real long name with no size limit, used for the titles in documents.
Example:
Studio 1 - Producer
Short name
A shorter name, used when the display needs a more concise form.
Example:
Studio1 Prod
Name (system)
A short code name used to identify this volume among the other storages of the project. This name is a string from 3 to 16 character long containing lowercase characters and numbers. The exact accepted regex pattern is ^[a-z0-9_]{3,16}$.
Example:
1prod
Identifier
An automatically generated string to identify the storage of the form: vol_# where # is a Universally Unique Lexicographically Sortable Identifier.
Example:
vol_01FWEWD03P3J2H98TQ0Y4AXF3H
Host Name
Host name or IP address of the machine host.
Example:
81.212.56.8orstudio1.yourdomain.com
SSH Port Number
The network port configured to access the storage using the SSH protocol. 22 is the default SSH port. You can indicate another port number if it is different from the default port.
Note
In a normal configuration, this port will only be accessed by the project's server hub. To increase security you can configure your firewall to only authorise its IP address.
User Name
The user account on the machine host.
Install the provided public SSH key under .ssh/authorized_keys in the user's home directory. This key is used by the synchronisation hub to access the storage without using a password.
Note
The rsync command must be installed on the system and accessible through this user's shell.
Path
The configured path to access the storage's files.
Example:
/folder/
Note
A file named .SyncPlanetVolumeRoot in the storage's root folder is mandatory to start the file transfers. This allows the synchronisation agents to verify that the folder is ready and mounted.
Shell
A command to use in place of the native shell. This is useful if the service is run inside a docker container.
Tip
Example:
/share/bin/docker exec -i centos-1 bash
Rsync options
This interface at the bottom of the parameters lets you configure the rsync options on the storage scope. These options will be used on every link that connects the storage. You can specify some options for a specific direction only.
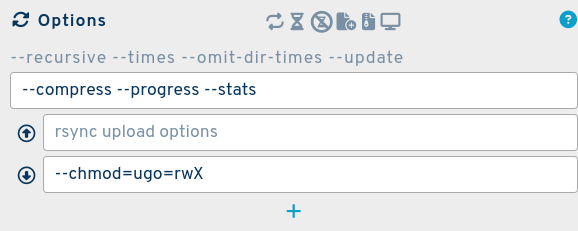
Please check the rsync options page for further details.
Health status
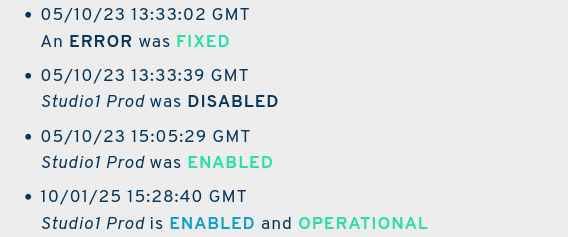
This section shows the status of the storage, whether it is currently operating properly or if there are issues to be resolved. It also displays a list of events by dates.
Geographic map

This map shows the location of the storages, their hub and the links between them. It is centered on the current storage. The localization of the storage is approximated according to its specified hostname, using a IP2GEO service.
Note
The localization can be specified manually using the geoloc key (see below).
Notes
This tab is used for personal notes regarding the storage unit.
JSON
This is the programming interface for the storage unit. Storages are described as JSON objects that you can modify using the API.
{
"_id": "vol_01FWEWD03P3J2H98TQ0Y4AXF3H",
"agentExitTime": "2023-10-05 13:33:39+00:00",
"agentStartTime": "2023-10-05 15:05:29+00:00",
"agentStatus": "on",
"author": "support",
"bytesRemaining": 18691697672,
"bytesTotal": 43980465111,
"bytesUsed": 25288767438,
"comment": "\n",
"hostname":"yourstudio.eu",
"image": "syncplanet/sync2:1.1.1",
"enable": true,
"error": 0,
"geoloc": [2.38333,48.91667],
"lastConnectionStatusChange": 1696512782000,
"lastErrorStatusChange": 1696512782000,
"longName": "Studio 1 - Producer",
"name": "1prod",
"port":3222,
"rsync_args": "",
"shell": "",
"shortName": "Studio1 Prod",
"time": 1603117017286,
"username": "sync",
"version": "1.1.1"
}
Please see environment setup page and API for details on how to setup a client and start programming.
Storage Setup
To set up a new storage, please see the following article on how to set up a storage unit
Next
Further reading :
- Try a demo storage
- Read the documentation on channels
- Learn about the hub
- Read the troubleshooting to debug a storage