Tutorial: Hub Setup
This short guide will guide you through the essential steps to set up SyncPlanet for your studios and enable them to share their work together.
Account
First, you need to create an account for your organization. Simply go to Start - SyncPlanet and type in an address in the “sign up” field to create your account.

From your account, you will be able to create and manage your hub, teams, and storages.
Requirements
To use the SyncPlanet services, you will require an adequate server set up and configured to act as your hub.
Choosing a server for your hub
You may choose to use a server you already own, or rent one from a cloud provider. Any server you use must be running OpenSSH and docker. If you choose to rent, we recommend you choose from a datacenter near the location of your main studio. It is important that your server has adequate storage capacity and bandwith for your project.
NAS
In addition to your hub, you will need a Network Attached Storage (NAS) per storage you wish to synchronise. These NAS must be running OpenSSH and Rsync.
Opening network ports
You will also need to setup a SSH service for each connected location. This will allow them to receive and send the files they need. The SSH server can be configured to listen to any port of your choosing.
The Hub
Hub parameters
To configure your server and have it act as your hub, you need to set its parameters. To do this, visit the connections panel in your account, and click on the Add button in the servers section.
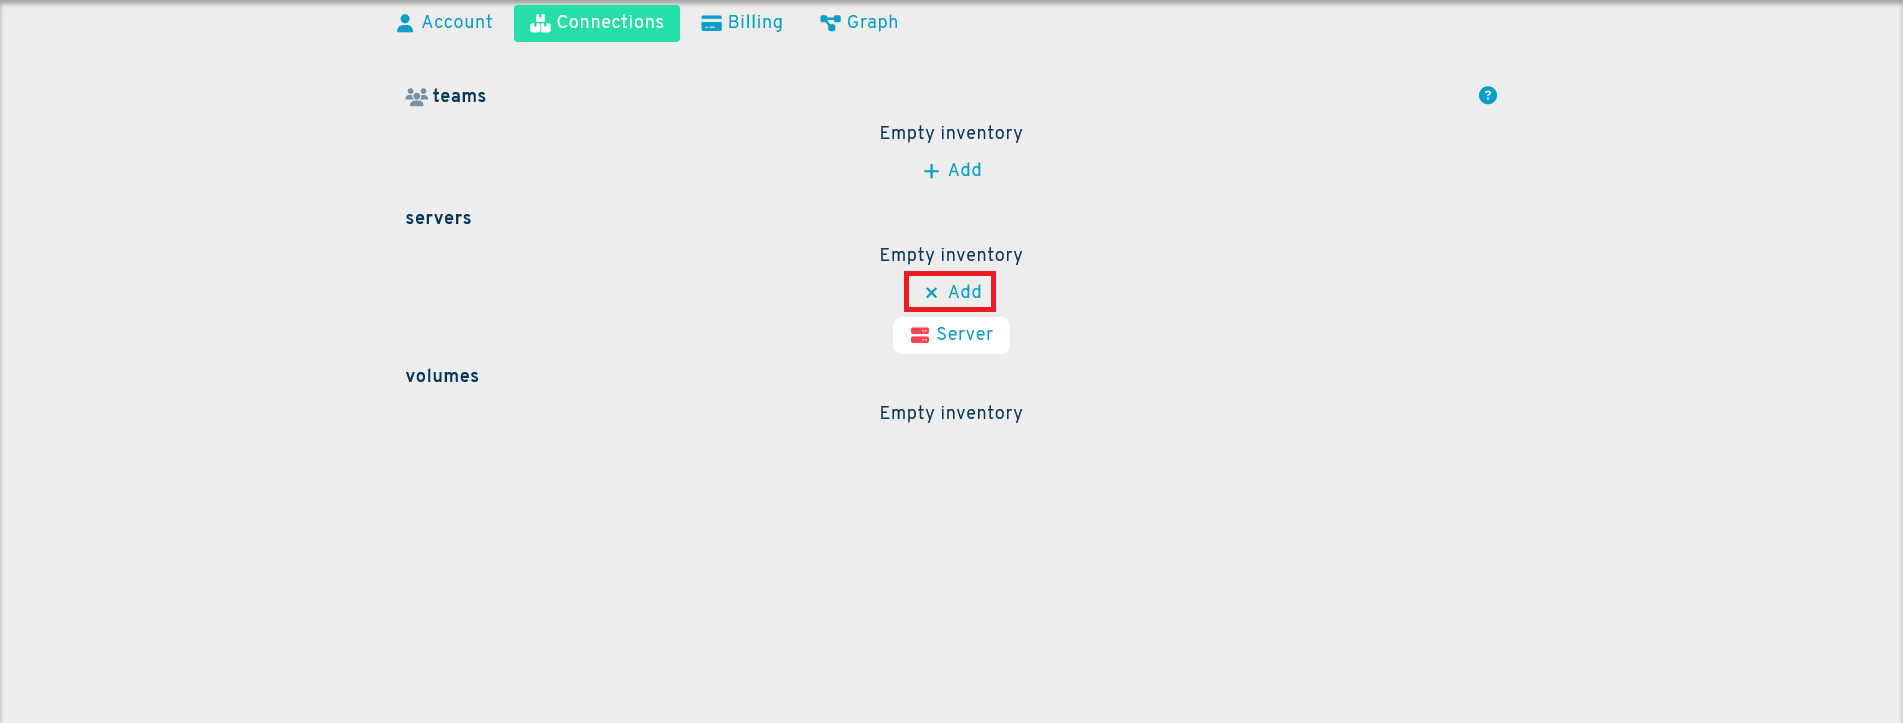
This will generate a new Server button. Click on it to open the newly created hub's interface.
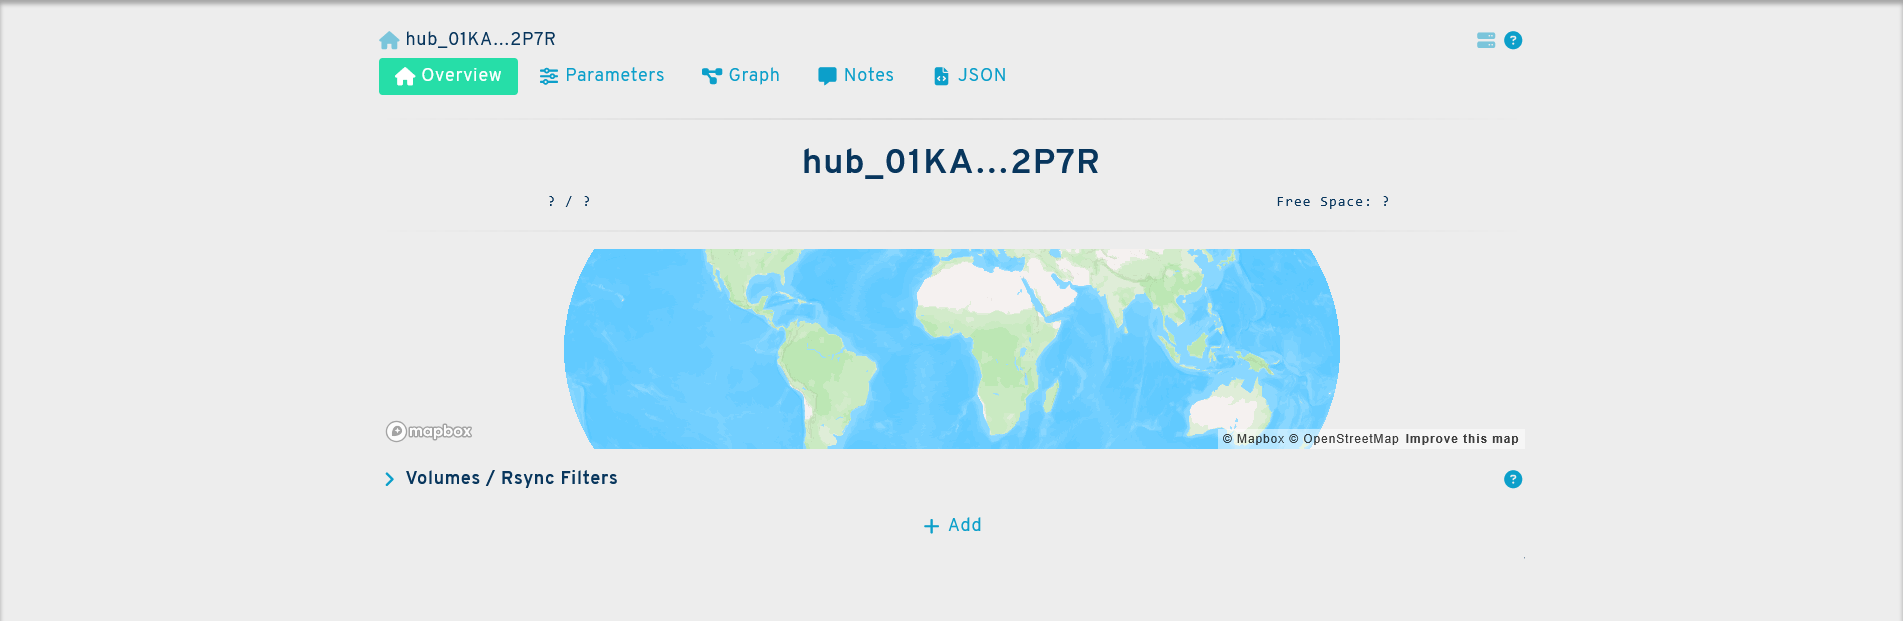
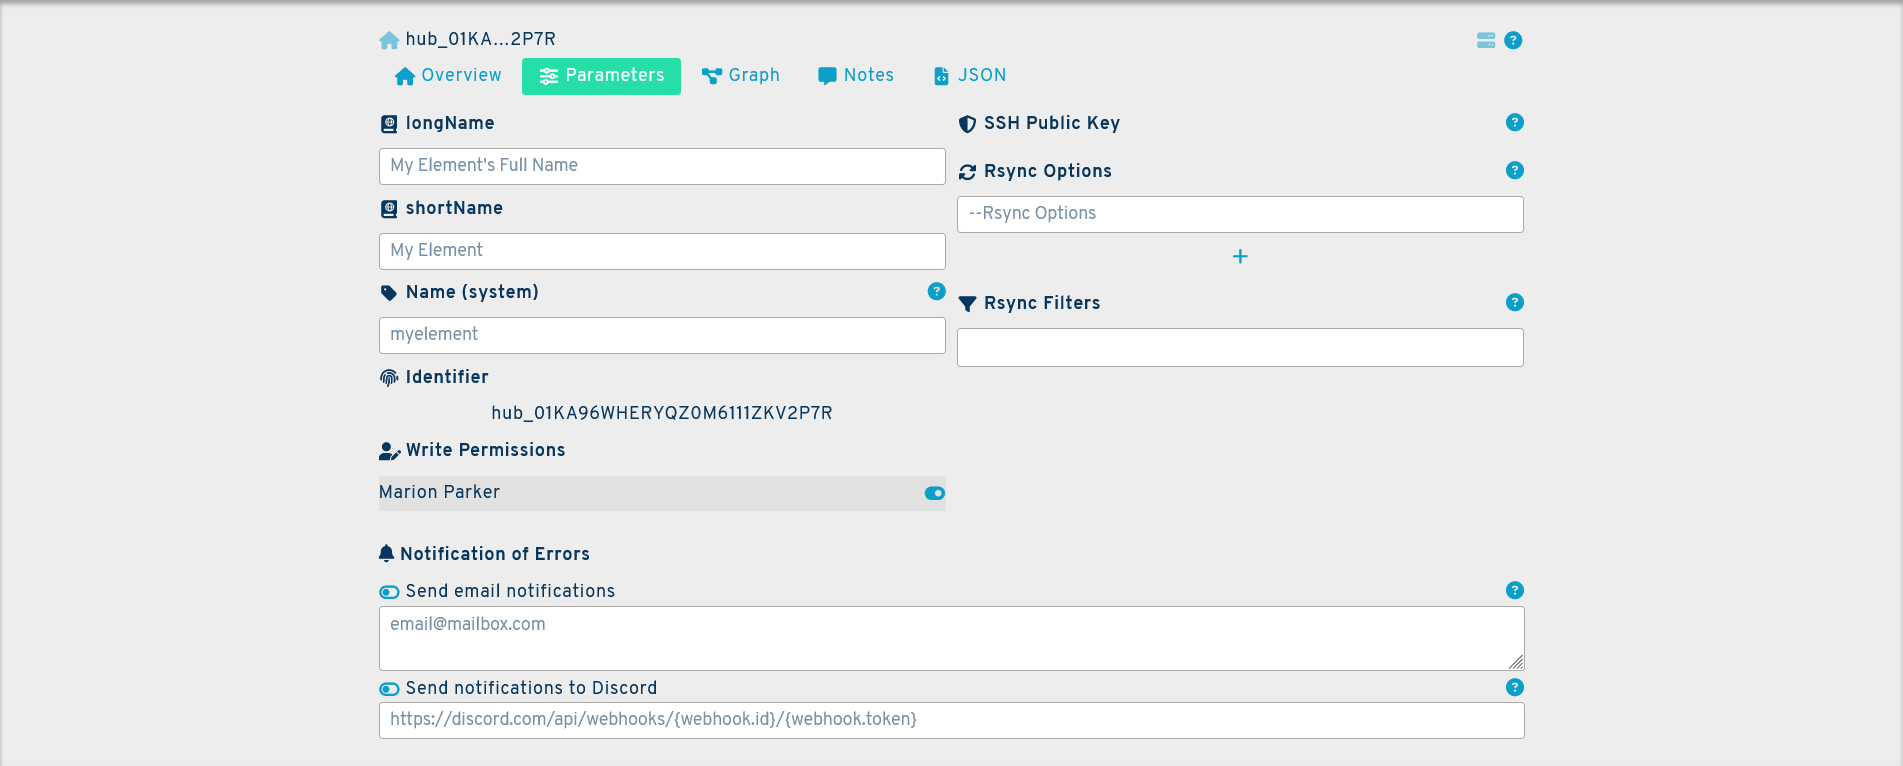
You can manage your hub and its volumes from this window. For now go to the parameters panel to set the initial parameters for your server. The following fields must be filled to configure your hub:
longName: this is the full name of your hub. It may be anything you choose.
shortName: this is the truncated name of your hub, when using the full name is not practical.
Name (system): this is the name of your hub in the system. It can be made of between 3 to 16 lowercase alphanumerical characters and cannot contain spaces. Generally, a shorter name, using initials for example, is more practical.
Rsync Options: this will allow you to tailor the behavior of your hub to your needs. A useful set of basic options would be: --times --recursive --update. Please note that leaving this field empty is possible, but not recommended as Rsync will likely do nothing without commands. For a non-exhaustive list of commands, please see: Rsync Options
Rsync Filters: like Rscync Options, this field allows you to customize the behavior of your server, this time by using filters to include or skip files or olders. This field is optional. A non-exhaustive list of filters can be found here: Rsync Filters
Configuration
After setting up the parameters of your hub, you will need to configure it to run the Syncplanet services. To do so, open the SSH console in your server and type in the following command:
syncplanet init <apikey> <hub_id>
This will start the configuration process. Once that command has been properly executed, run the next command on the list:
cd hub.name
And finally:
docker compose up -d
Please note that in order for the docker command to execute properly, you will need a subscription to SyncPlanet
Your server is now ready to act as your hub. You can now start creating teams and volumes to connect to the hub. For more information regarding the hub, please see: Hub
The Storages
Creating a new storage
The quickest way to create a storage is to go to the overview panel of your hub page and click on Add at the bottom of the page. This will generate a storage button. Click on it to create a new storage and automatically open its page.

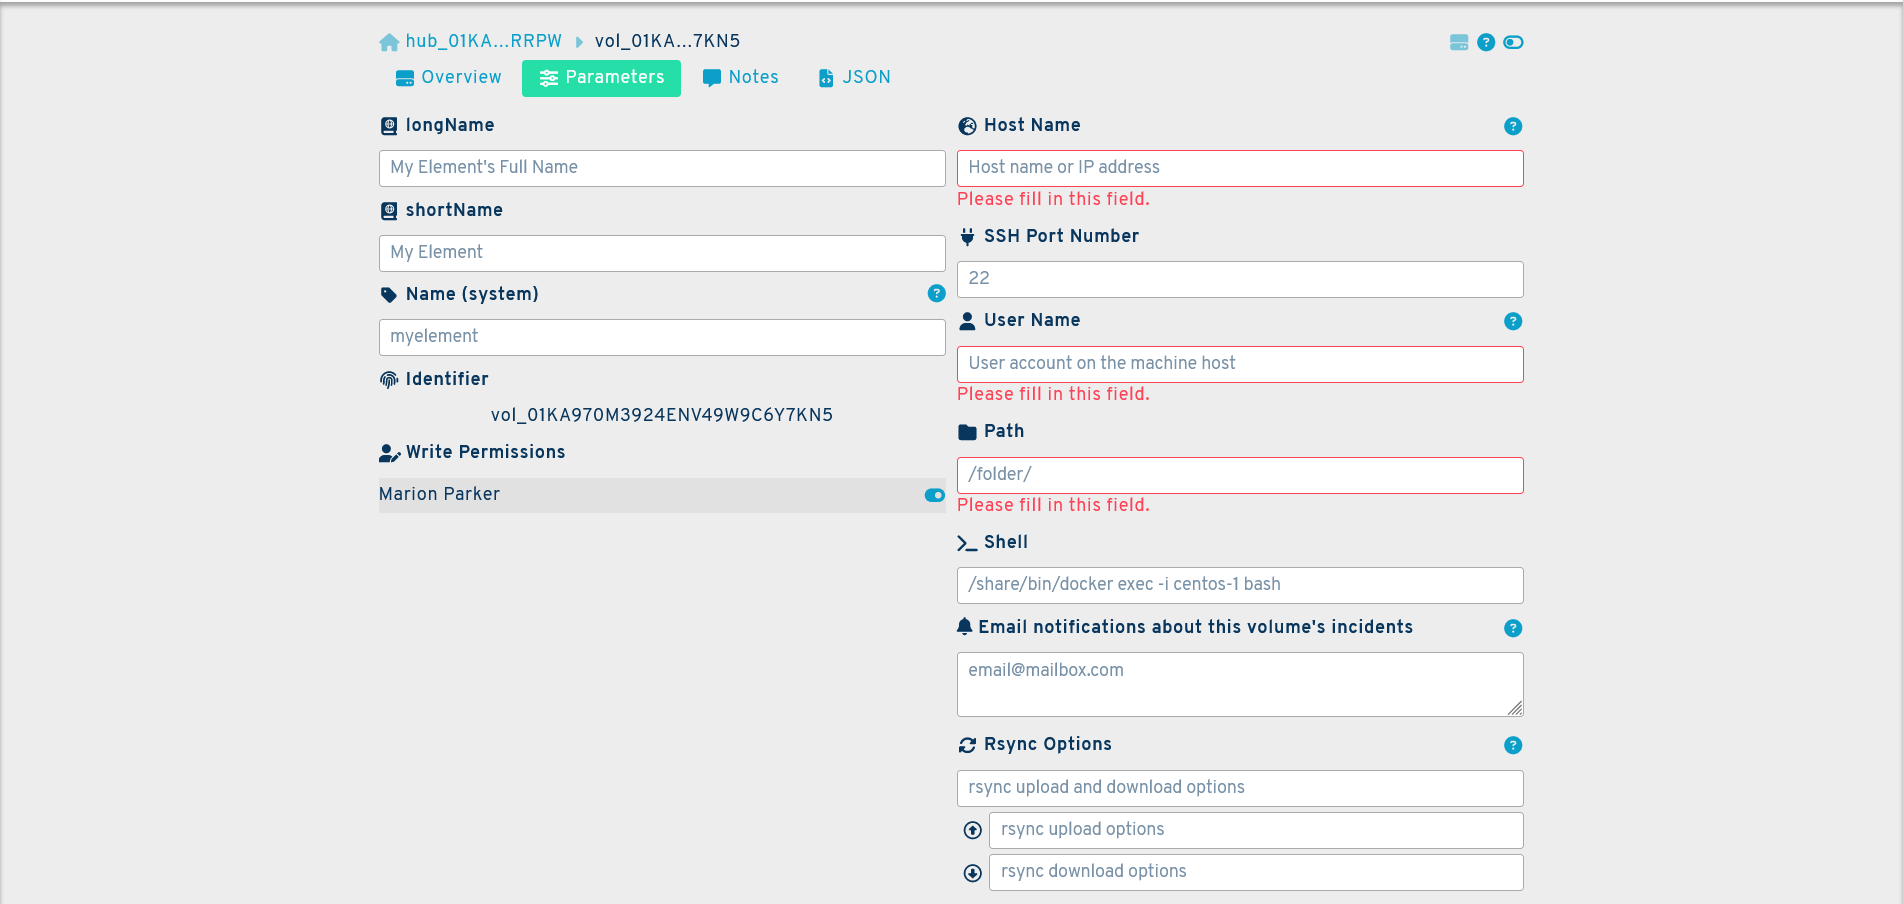
You will find that the storage page is similar to the one used for the hub. To configure your storage, go to the parameters panel and fill in the following fields:
longName: this is the full name of your storage. It may be anything you choose.
shortName: this is the truncated name of your storage, when using the full name is not practical.
Name (system): this is the name of your storage in the system. It can be made of between 3 to 16 lowercase alphanumerical characters and cannot contain spaces.
Host Name: the IP address of the machine running the storage.
SSH Port Number: the network port configured to access the storage using the SSH protocol. By default, this is port 22.
User Name: the name of the user account for SSH.
Path: the folder path where the files to be transferred are located. You must have a file named “.SyncPlanetVolumeRoot” in the volume's root folder to start file transfers. This allows the synchronization agents to verify that the folder is ready and mounted.
Shell: a command shell to use in place of the native shell. This is useful if the service is run inside a docker container. This field is optional. Using it is only recommended for experts.
Rsync Options: this will allow you to tailor the behavior of your storage to your needs via Rsync options. This field is optional. For a non-exhaustive list of options, please see: Rsync Options
Finally, you must install the hub's public SSH key under .ssh/authorized_keys in the user's home directory.
Your storage should now be configured and connected to the hub. This step will need to be repeated for each storage you wish to add.
You can find and manage your storages on the connections panel of your account. For more information regarding storages, please see: Storage
Adding teams
The last step of this set up process is to add users, or teams. To do this, visit the connections panel in your account, and click on the Add button in the teams section. This will generate a team button. Click on it to create a new team and automatically open its page.
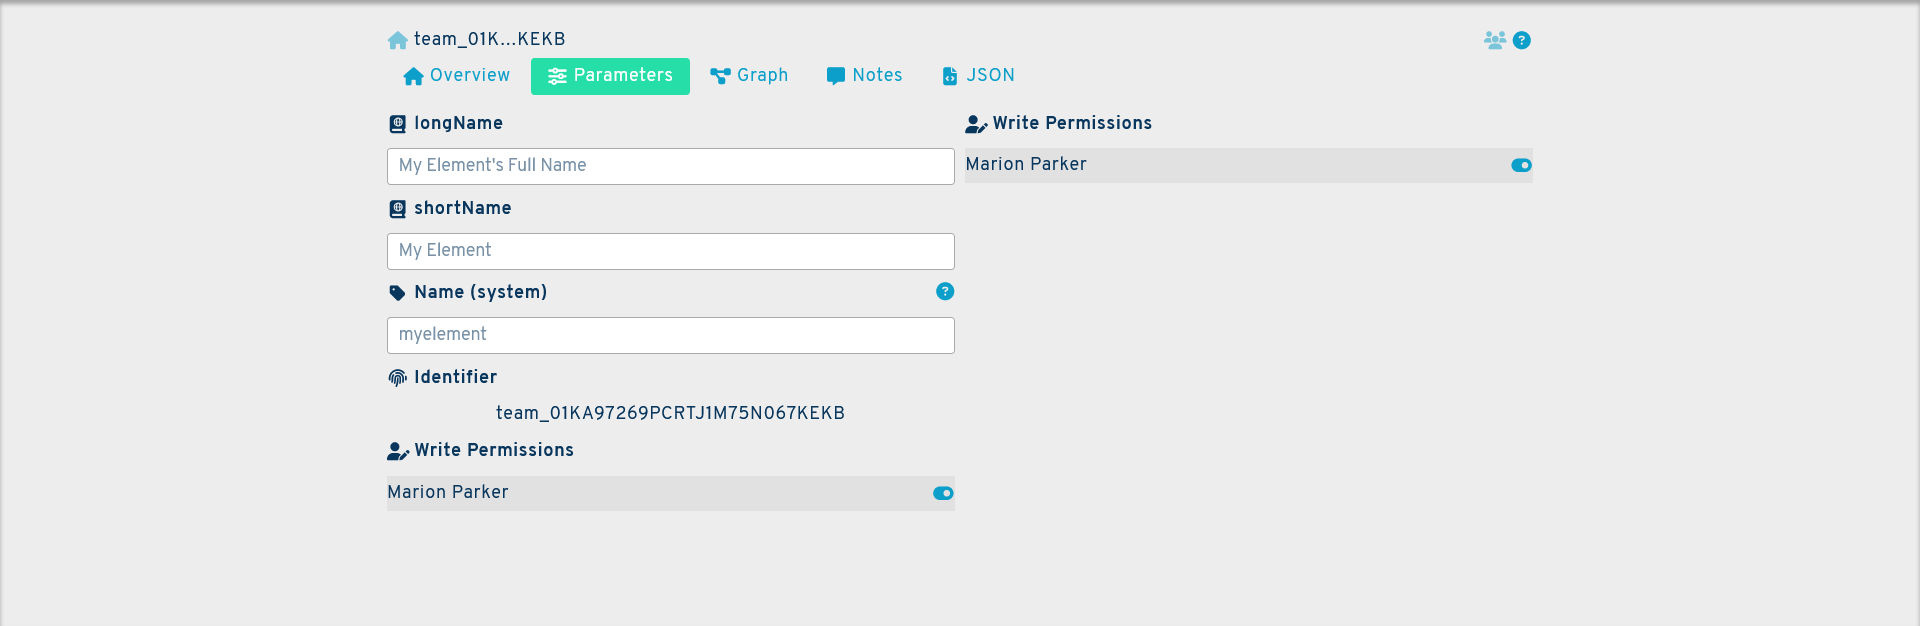
This will create a new team and automatically open the new team's page. From there, go to the parameters panel and fill in the following fields :
longName: this is the full name of your team. It may be anything you choose.
shortName: this is the truncated name of your team, when using the full name is not practical.
Name (system): this is the name of your team in the system. It can be made of between 3 to 16 lowercase alphanumerical characters and cannot contain spaces.
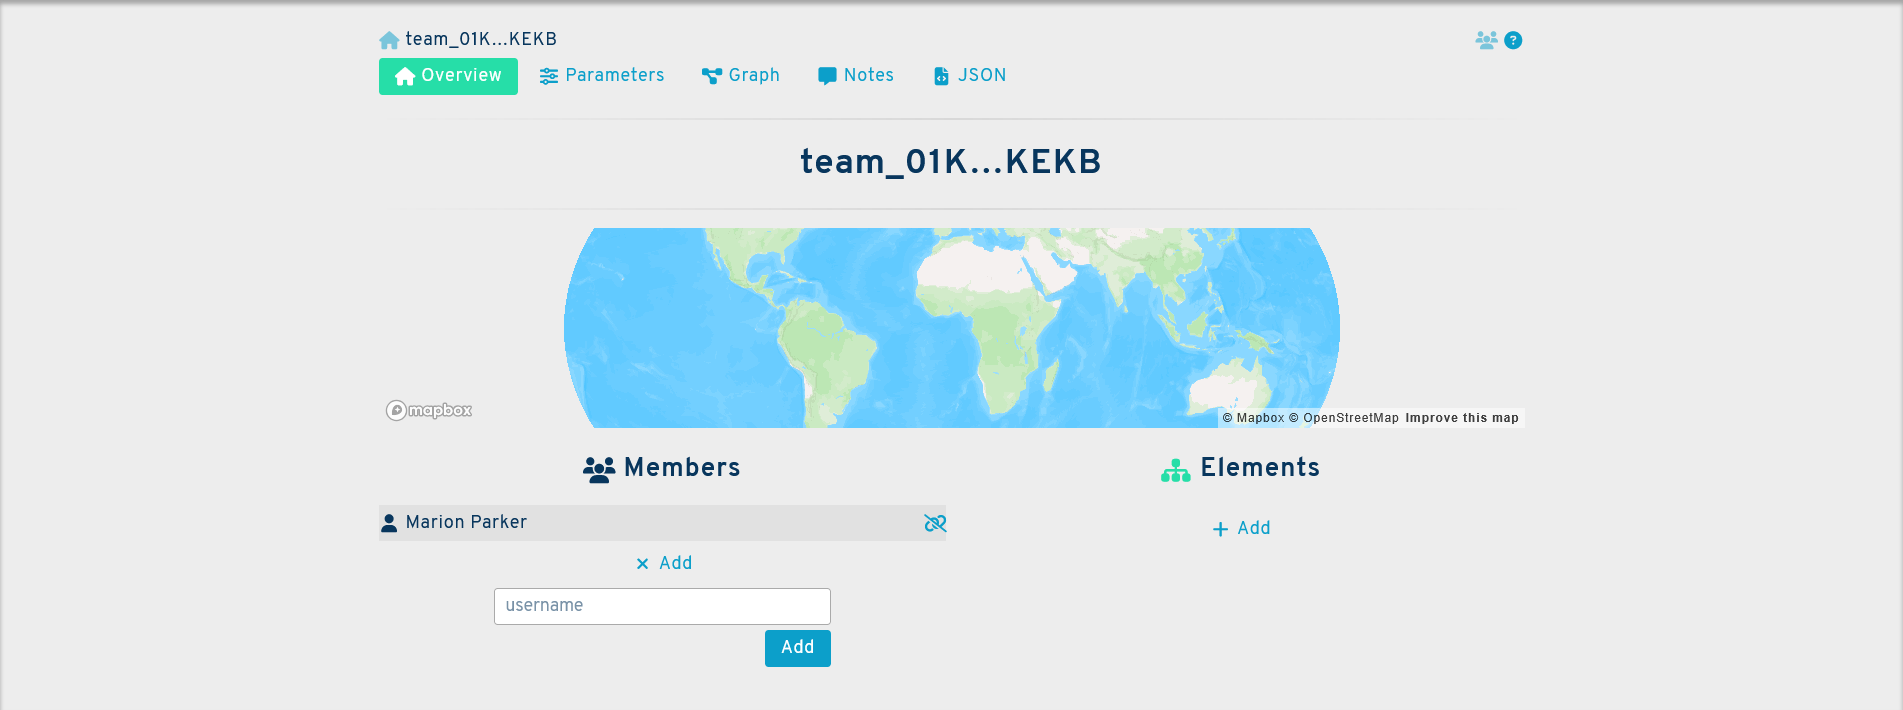
To add members to your team, go to the overview panel, and click on the Add button under the members section. This will open a new field. Add the username of the user you wish to add and click on add. The new member will be added to the team. Finally, you need to connect the team to a storage or hub. To do so, you will need the identifier of the storage you wish to connect the team to. It can be found in the storage page, under identifier. It is marked with a fingerprint icon.
Copy the identifier and paste it in the elementidentifier field of the overview panel of your team. Your team will be connected and able to start synchronising files.
Additonal Questions
If you have any questions regarding the set-up process that are not answered by this guide, please contact us at support@syncplanet.io. In addition, some of our subscription plans include full support days.